Snowflake Free Desktop SQL Client
QStudio is a free SQL Client for Snowflake database that allows running SQL scripts, easy browsing of tables, charting and exporting of results. It works on every operating system, with every database including Snowflake.
Setting up a Snowflake connection in QStudio
Start Snowflake
As an example of starting Snowflake:
- Go to snowflake
- Create a new project and database.
Get Connection Details
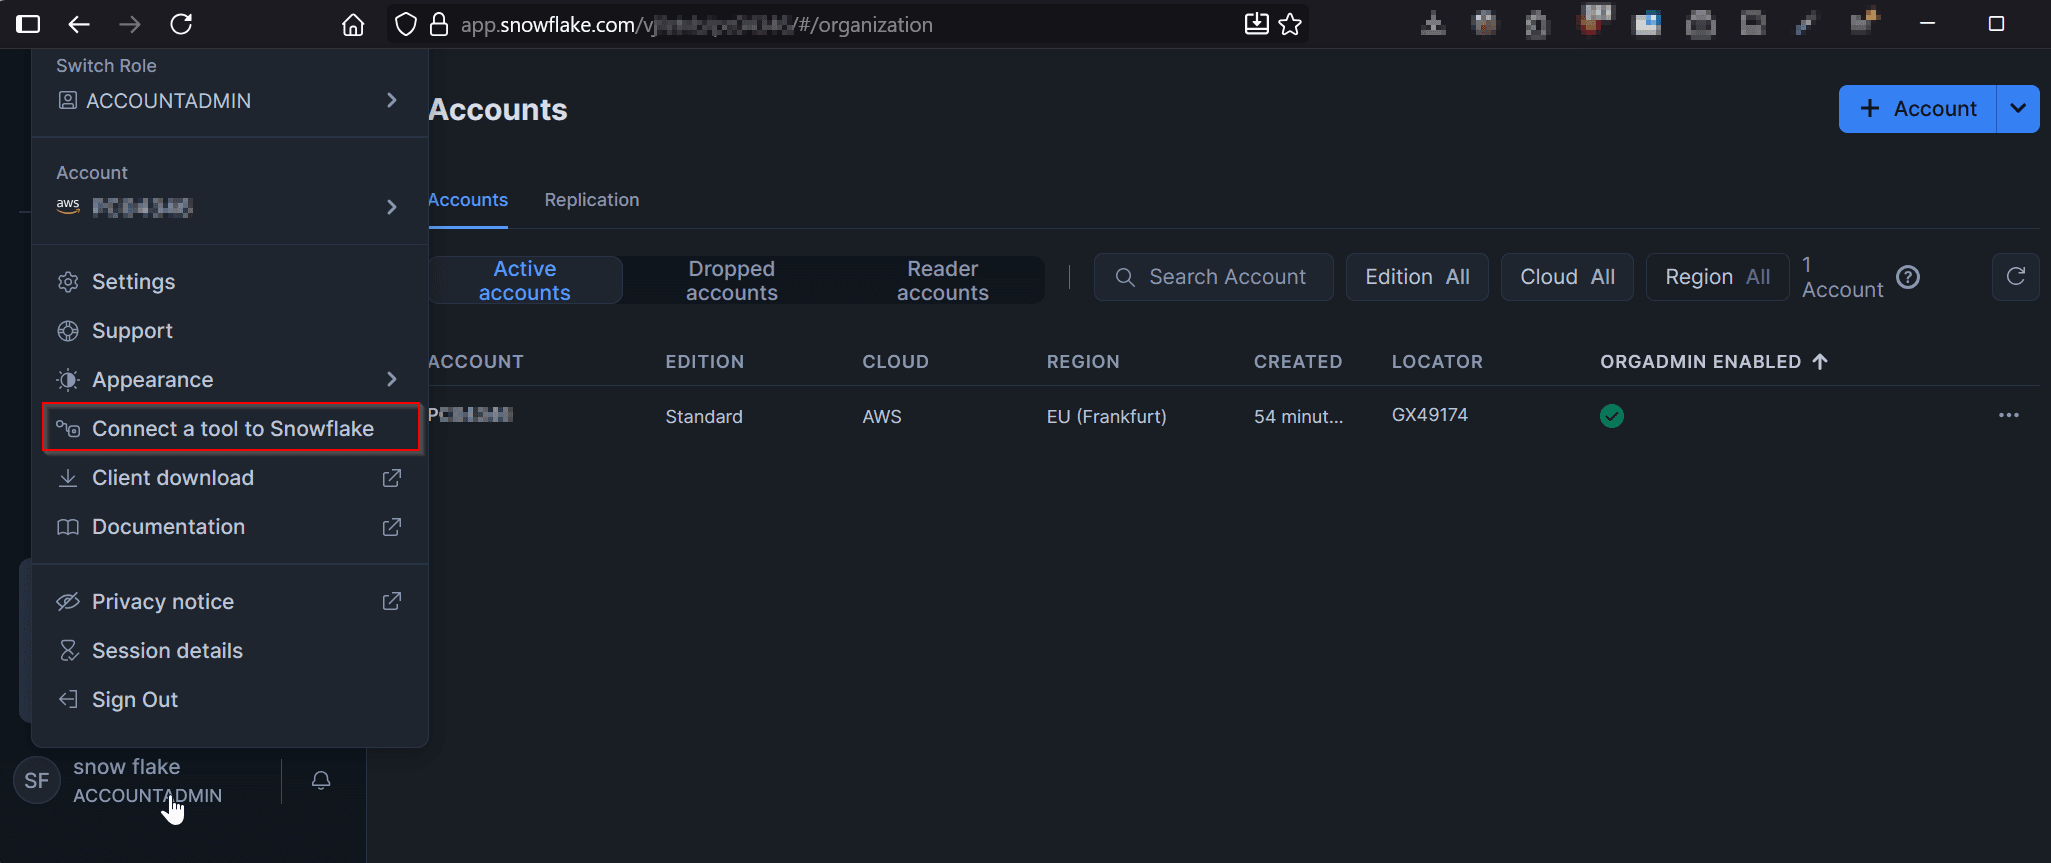
Click your account name at the bottom and then "Connect a tool".
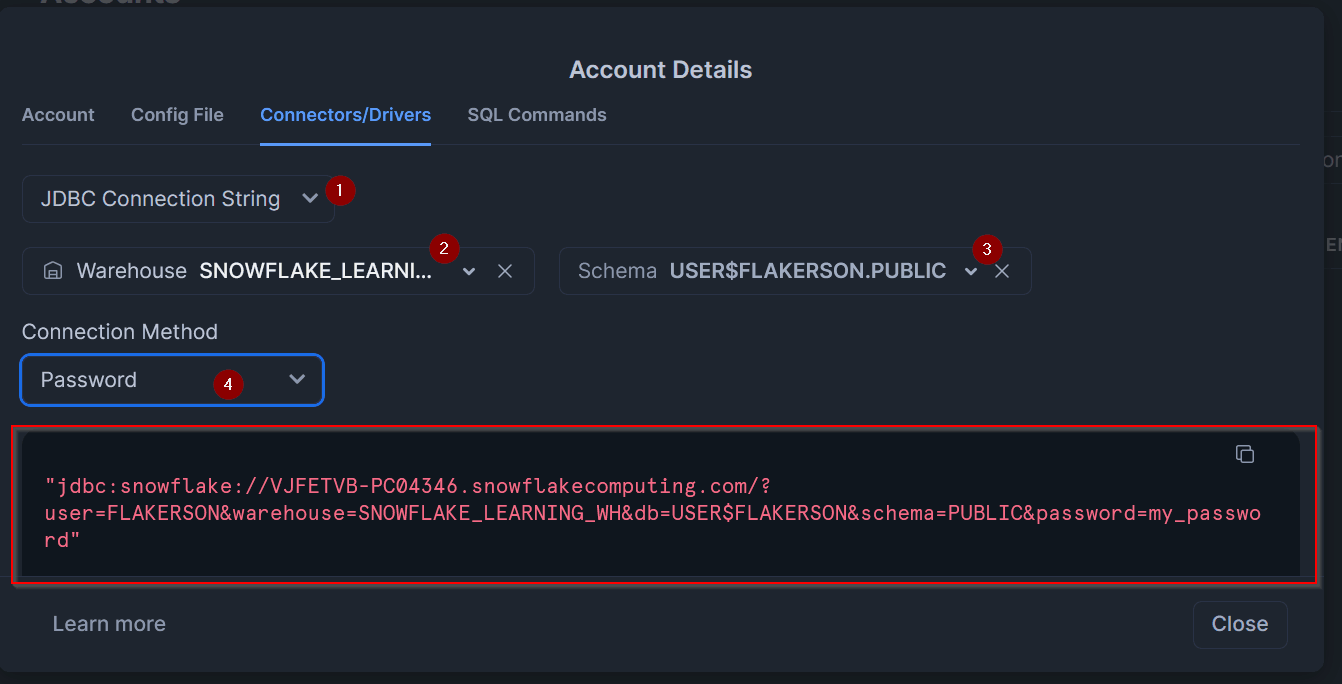
Select the relvant details on the dropdowns and then copy the JDBC URL. Note the URL will not contain your password you will need to fill it in.
Create QStudio Connections
Connecting to a Server
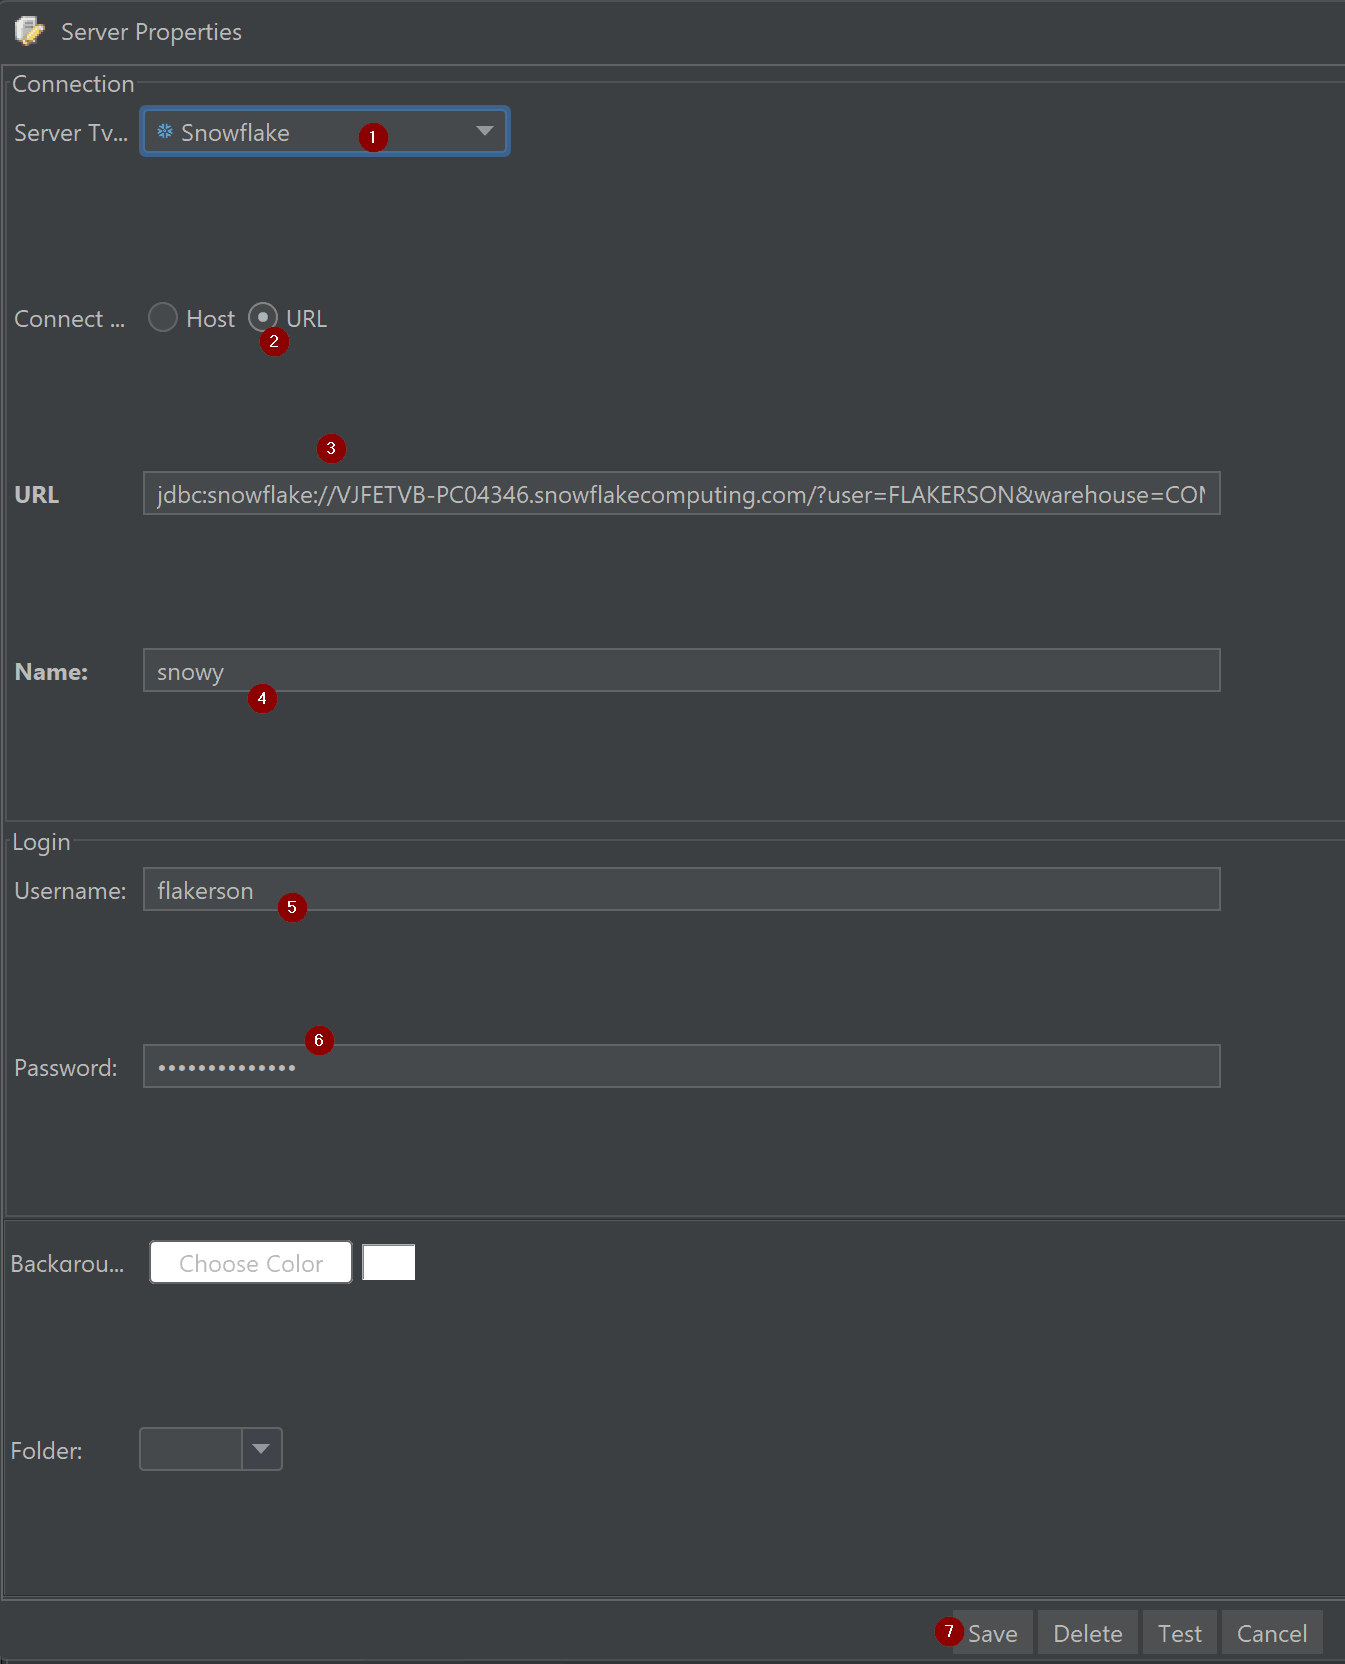
When you first open QStudio click on the menu options Server->Add Server or on the add server button on the toolbar.
Then set the details:
- Server Type: Snowflake
- Connect By: URL
- URL: jdbc:snowflake://VJFETVB-PC04346.snowflakecomputing.com/?user=FLAKERSON&warehouse=COMPUTE_WH&db=USER$FLAKERSON&schema=PUBLIC&password=my_password
- Username: USER
Password: PASSWORD - Click Add
Note, I also had to complete the username and password boxes to get it to work. The first time you will also see a popup as QStudio has to download the driver.
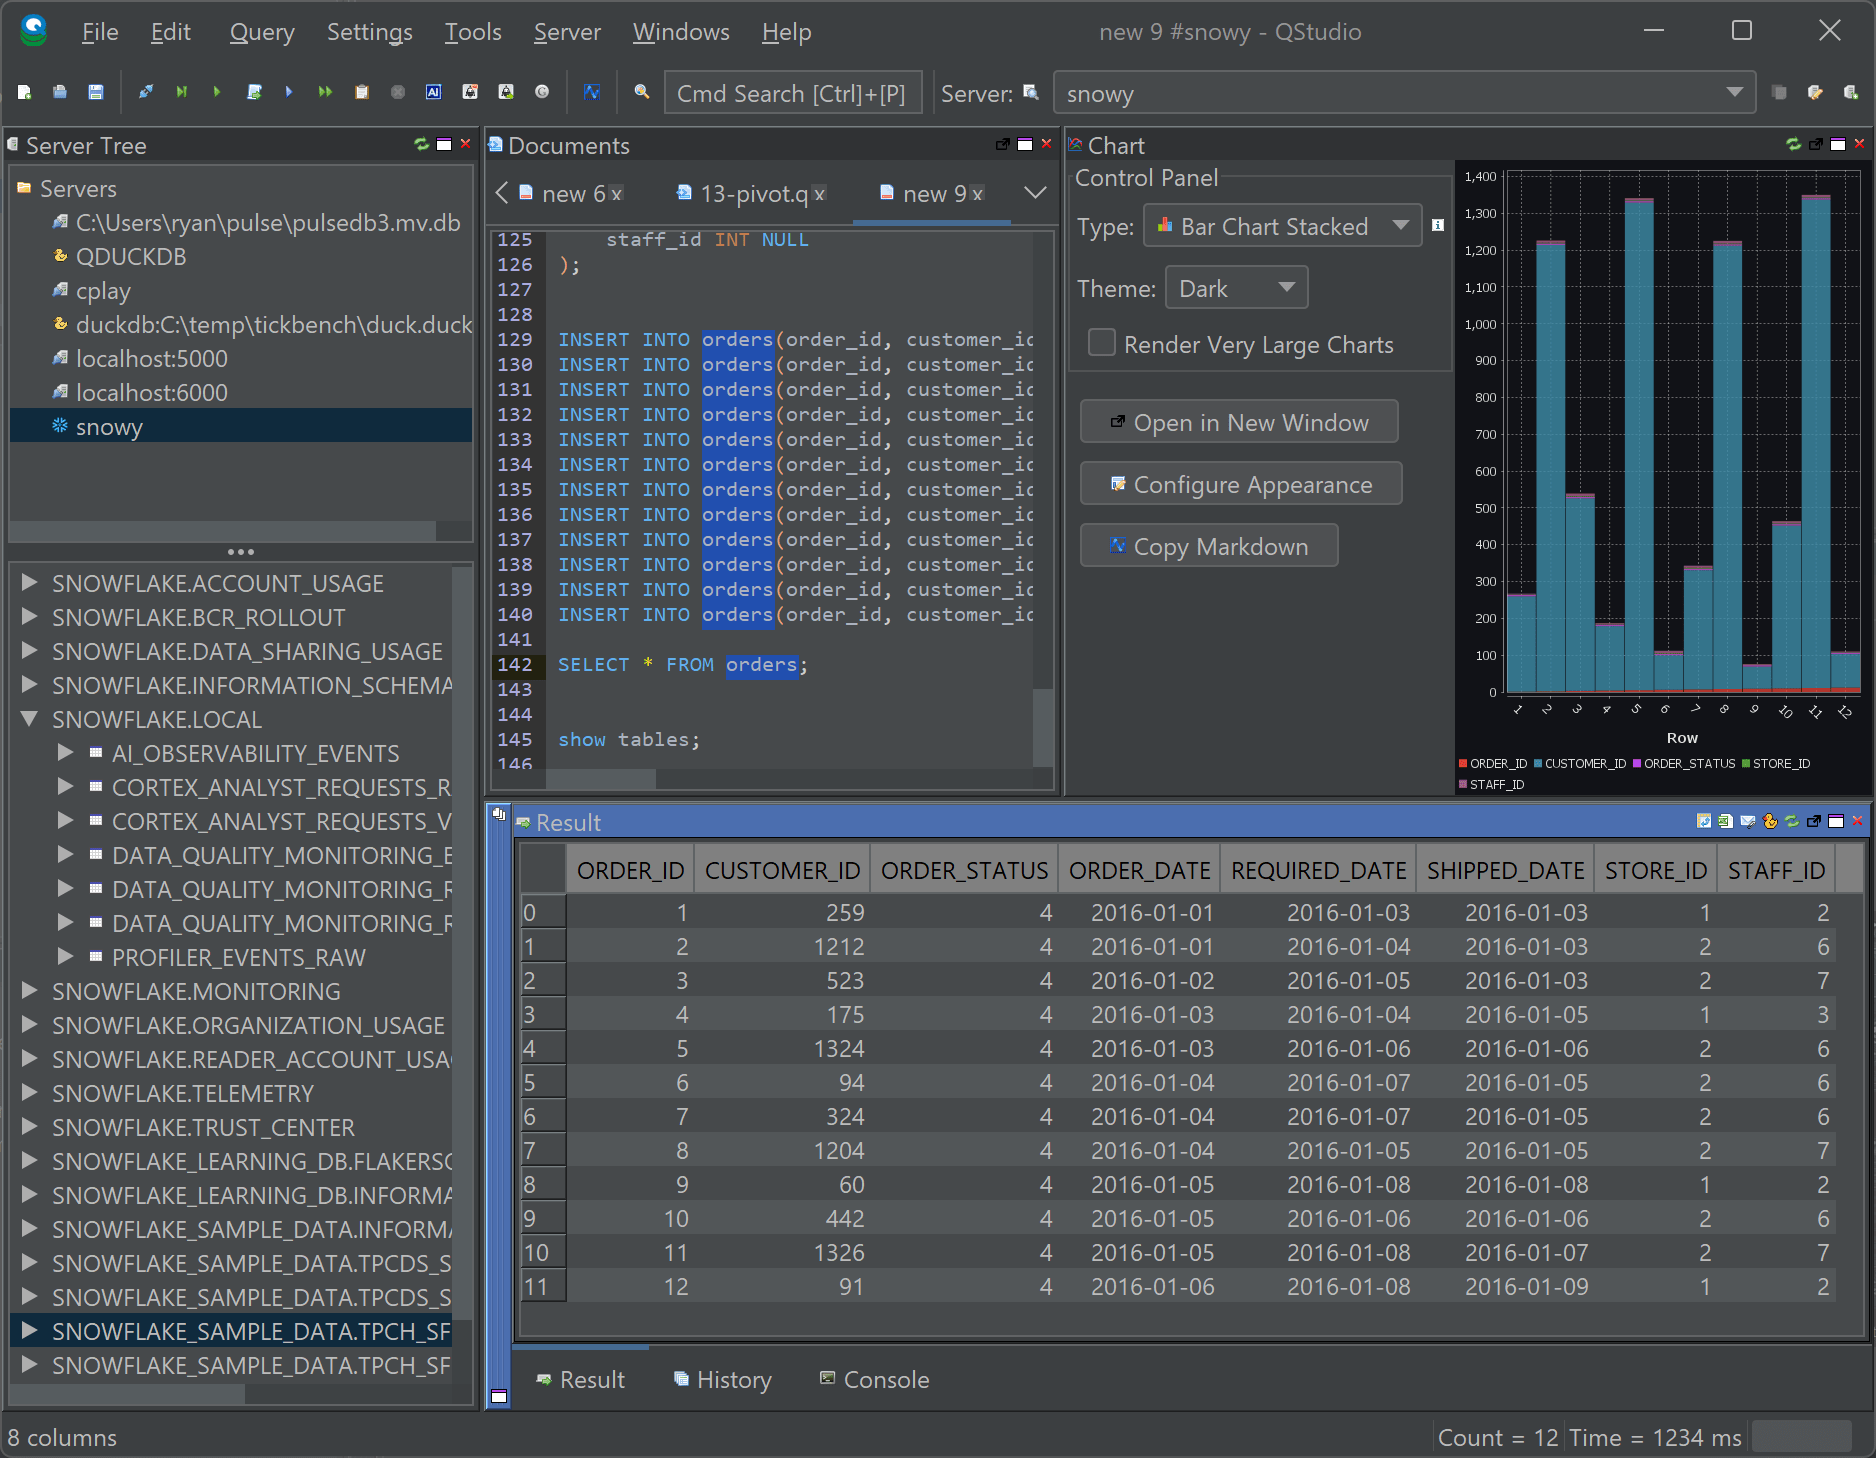
Sending Queries
You can run queries by highlighting selected code and pressing :
| Command | Shortcut |
|---|---|
| Run Current Statement | Ctrl + q |
| Run highlighted text | Ctrl + e |
| Run Line | Ctrl + Enter |
Create a Table
This will update your various results panels, result contains your table (excel export etc. supported), charts are generated based on your data and the console summarizes your recent commands
Notes:
- You may get an error "Snowflake JDBC driver internal error: Fail to retrieve row count for first arrow chunk: null "
which is due to this bug. Run this query to fix it:
ALTER SESSION SET JDBC_QUERY_RESULT_FORMAT='JSON';
- You may only be able to run one query at a time.
- You may have to restart QStudio after first adding the server to get the driver to load properly.
Well Done!
You have now got QStudio querying your database successfully.
We want to make QStudio the best SQL analysis tool. If you have any problems or want additional features, please post on our github repo.