Creating Applications
A application is single page, containing a group of related charts and forms. Each application can be permissioned, bookmarked and interacted with by a user. In this article we focus on:
- Creating a new application
- Add/Remove charts to/from a application
- Changing the layout of a application
- Renaming the application
- Saving the application
- Sharing Applications
Creating a new application
To create a new application, on the application listing page click "Add Application".
This will create a new application with a randomly selected name. The image is an identicon generated based on the application name. clicking on the application image will go into that application.

Add/Remove charts to/from a application
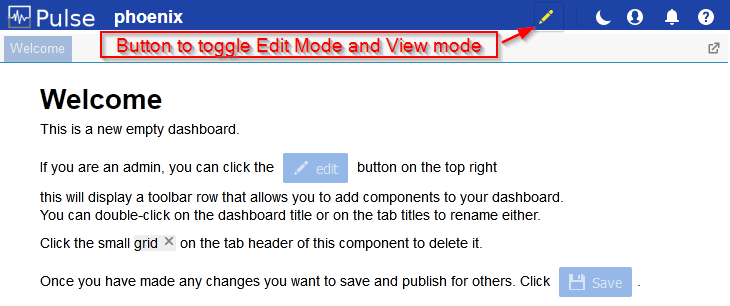
When a new application is first opened it contains a single chart/widget that contains welcome instructions.
To allow editing, click the eye/pencil icon to toggle between edit and view only mode.
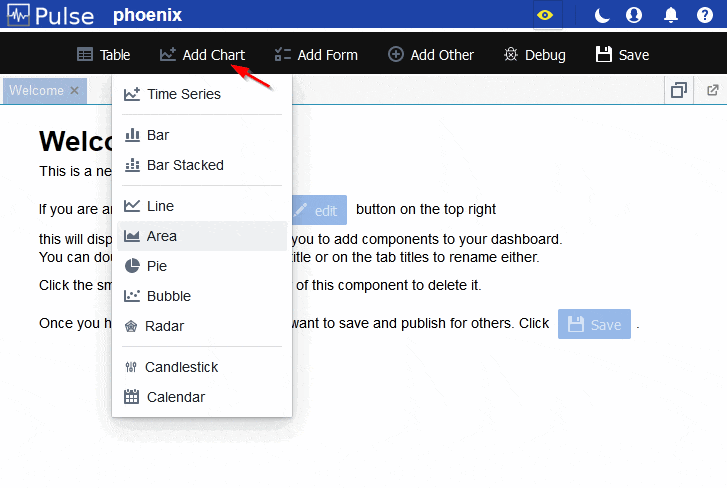
Now that you are in edit mode, a Toolbar will appear allowing you to add charts or other widgets.
Clicking one of the "Add" options, will select that chart and allow you to drop it onto the application.
Changing the layout of a application
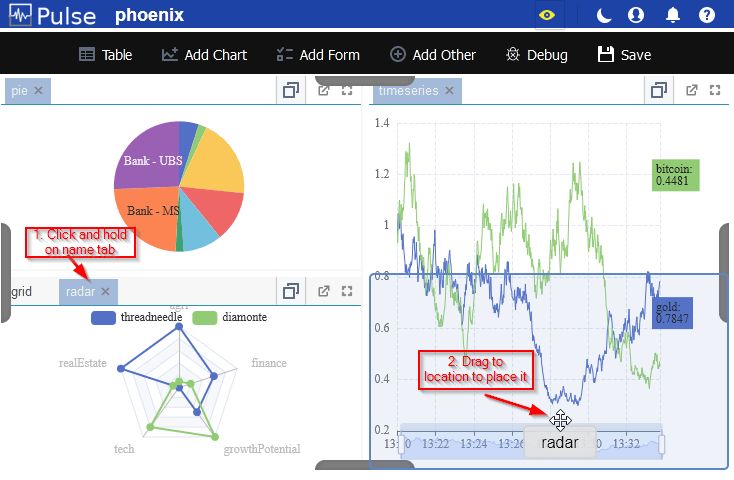
The "name tab" for each chart allows you to:
- Double-click the name to rename that tab.
- Drag the tab name to move that chart.
- Click X to close the chart and delete it from the application.
Renaming the application
To rename the application:
- Make sure you are in edit-mode.
- Double click on the existing title.
- Type the new title thn press enter.
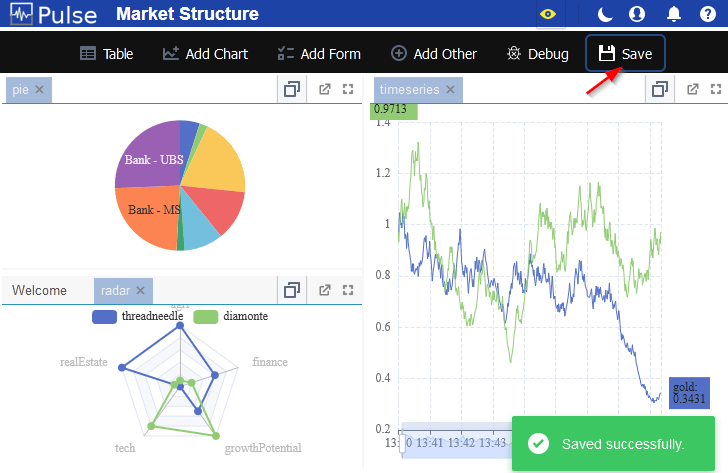
Saving the application
After all changes including renaming you MUST click the save button to save your changes. Any forms you have entered parameters for, will be saved with those parameters as the default when a new user opens them.
Sharing applications
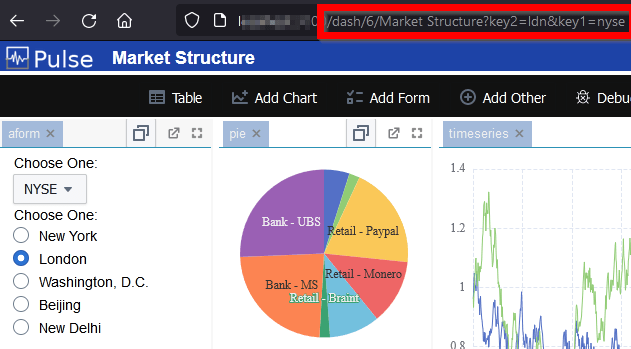
Applications can be shared simply by sending someone the URL. The URL will contain the parameters used to create your current view.